Showing posts with label Bar Cookies. Show all posts

Friday, November 4, 2011

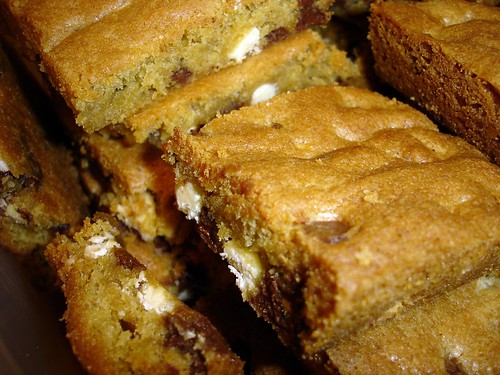
Chocolate Chip Macadamia Nut Cookie Bars.......Week 6 of the 12 Weeks of Christmas Cookies


It has been such a busy crazy time for me.  I'm sure many of you can relate.   But I still had time to bake something this week.  It needed to be quick and it needed to be easy.  But it still had to be a yummy dessert.  You will find it in these Chocolate Chip Cookie Bars.  The addition of Macadamia nuts elevates it to something extra special and extra delicious.  


Chocolate Chip Macadamia Nut Cookie Bars
Recipe by Ghirardelli

Yield: 16 bars

Ingredients

12 ounces Semi-Sweet Chocolate Chips
1 cup butter, softened (2 sticks)
1 1/2 cups brown sugar, packed
2 teaspoons vanilla
2 large eggs
1 1/2 cups all-purpose flour
1 1/2 teaspoons baking powder
1 teaspoon salt
1 cup macadamia nuts, coarsely chopped

Directions


Preheat oven to 325 degrees.  In a large bowl, beat butter with brown sugar at medium speed until light and fluffy.  Add vanilla and eggs.  Add eggs one at a time, mixing on low speed until combined.  Combine flour, baking powder and salt in a small bowl.  Gradually add to egg mixture while mixing on low speed.    Fold in chocolate chips and macadamia nuts.  Spread batter evenly into a 13" x 9" pan. (I suggest spraying lightly with cooking spray)


Bake for 25 to 30 minutes or until wooden pick inserted in center comes out clean. Cool completely in pan on wire rack.  Cut into squares.


It's Week 6 of the 12 Weeks of Christmas Cookies.  Halfway there.  For more ideas, see what other bloggers are baking up with the blog hop below.


Enjoy!

Mom's Cooking Club Lesson:  When you want to bake homemade cookies but pressed for time, try making cookie bars.  One pan and less work with all the delicious flavor of freshly baked cookies.


Share

Thursday, October 20, 2011

Snickers Brownies.......Week 4 of the 12 Weeks of Christmas Cookies


Ever since I made these Peanut Butter Cup Brownie Bites, I've been obsessed with adding candy to my baked goods.  I was going to make Snickers Cookies (yes there is such a thing), but due to time constraints, I needed to do something that would be be quicker.  So, I googled Snickers Brownies and found this recipe by My Baking Addiction.  


How do I describe these?  Decadent. Rich. Chocolaty. Fudgy. 


Was it a good idea to add Snickers Bars to brownies?


Oh YES!


I know this is a little different for a Christmas treat but I don't think anyone would mind if these showed up on your cookie platter this year.   

Snickers Brownies

yield | 12 brownies

Ingredients

4 ounces unsweetened chocolate; coarsely chopped
3/4 cup butter, unsalted
1 ½ cups white sugar
3 eggs; lightly beaten
1 teaspoon vanilla extract
¼ teaspoon kosher salt
1 cup all-purpose flour
12 Fun Size Snickers Candy Bars; cut into fourths (I used 10 Snickers)

Directions

1. Preheat oven to 350 degrees. Line an 8×8 inch baking pan with foil and spray with nonstick cooking spray.
2. Microwave chocolate and butter in large bowl at medium (50% power) for 3-4 minutes or until butter is melted.
3. Whisk until chocolate is melted. Stir in sugar. Add in eggs, extract and salt. Gradually add in flour and stir until just combined.
4. Spread ½ the batter into prepared pan. Add an even layer of Snickers and cover with remaining ½ of brownie batter. Bake for 30-35 minutes; do not over bake.
5. Remove to cooling rack. Cool completely before cutting.


The hidden special ingredient in these brownies.  All I can say is WOW!


Lining the pan with foil makes it easy to lift out of the baking pan and cut into squares.


It's Week 4 and I'm working my way through the 12 Weeks of Christmas Cookies.  See the blog hop below for more shared holiday treats.

Enjoy!

Mom's Cooking Club Lesson:  Snickers candy bars have been around a long time.  They were introduced by Mars, Incorporated in 1930.  A candy bar that stays around for 81 years has to be pretty special.  Roasted peanuts, nougat, caramel and milk chocolate.....Snickers!


Share


Sunday, May 15, 2011

Peanut Butter and Jelly Bars


Peanut Butter.  My favorite.  Peanut Butter and Jelly Sandwiches.  My favorite childhood sandwich.  Peanut Butter and Jelly Bars.  My new favorite dessert bar.

I absolutely love the combination of this peanut butter cookie bar with a layer of jelly filling and crunchy peanuts on top.  Adults and kids will love them.  Try these.  But be warned.  They will not last long.

I first saw this recipe on Jerry's blog, Jerry's Thoughts, Musings and Rants.  I then saw it soon after in my March 2011 issue of Bon Appetit.

Peanut Butter and Jelly Bars

Serving: 16 bars


Ingredients


  • Nonstick vegetable oil spray
  • 1 1/2 cups unbleached all purpose flour
  • 1/2 teaspoon baking powder
  • 3/4 cup smooth peanut butter
  • 3/4 cup (packed) golden brown sugar
  • 1/2 cup (1 stick) unsalted butter, room temperature
  • 1 large egg
  • 1 teaspoon vanilla extract
  • 3/4 cup grape jelly or other jelly or jam
  • 2/3 cup coarsely chopped salted dry-roasted peanuts

Preparation


  • Preheat oven to 350°F. Line 8x8x2-inch metal baking pan with heavy-duty foil, leaving 2-inch overhang around edges and pressing firmly into corners and up sides of pan. Coat foil with nonstick spray. Whisk flour, baking powder, and 1/4 teaspoon salt in small bowl. Using electric mixer, beat peanut butter, sugar, and butter in large bowl until smooth. Add egg and vanilla; beat on low speed until smooth. Add flour mixture; beat on low speed just to blend. Transfer half of dough to prepared pan (about scant 1 1/2 cups). Place remaining dough in freezer for 10 minutes. Using fingertips, press dough evenly onto bottom of pan. Spread jelly over in even layer. Remove dough from freezer; using fingertips, break into grape-size pieces and scatter over jelly layer. Sprinkle chopped nuts over.
  • Bake bars until top is golden brown, about 30 minutes. Cool bars completely in pan on rack.
  • Using foil overhang as aid, lift bars from pan. Gently peel foil from edges. Cut into 16 squares. DO AHEAD Can be made 3 days ahead. Store airtight at room temperature.        


Enjoy!

Mom's Cooking Club Lesson:  Change the flavor by using different jellies and jams like strawberry, raspberry or blackberry.  


Share

Friday, November 12, 2010

Cream Cheese Brownies.......12 Weeks of Christmas Cookies: Week 7

Cream Cheese Brownies

After 6 weeks of making cookies, I had to make a change.  And, in my book, there is no better change than brownies.  Brownies are one of my family's favorite treats.  I wanted to make brownies with a little something extra.  That something extra is cream cheese.  If you have never had the combination of cream cheese and brownies, you need to make these soon.  These brownies are in between cake-like and fudgy.  Full of chocolate flavor along with the slightly tangy cream cheese layers make a fantastic brownie.  


Cream Cheese Brownies

16 Squares

Ingredients

10 tablespoons unsalted butter, cut into pieces, plus more for pan
1 cup plus two tablespoons all-purpose flour
1/4 cup unsweetened cocoa powder
1/2 teaspoon baking powder
1/2 teaspoon salt
8 ounces semisweet or bittersweet chocolate, chopped ( I used Baker's Semisweet Chocolate )
4 ounces room-temperature bar cream cheese
1 1/2 cups sugar
4 large eggs

Directions

1.Preheat oven to 350 degrees. Brush a 9-inch square baking pan with butter or spray with cooking spray. Line bottom and two sides with a strip of parchment paper, leaving a 2-inch overhang on the two sides. Butter paper, and set pan aside. In a small bowl, whisk 1 cup flour, cocoa, baking powder, and salt; set aside.

2.Place 8 tablespoons (1 stick) butter and chocolate in a large heat-proof bowl set over (not in) a saucepan of gently simmering water. Heat, stirring occasionally, until smooth, 2 to 3 minutes; remove bowl from pan. Add 1 1/4 cups sugar; mix to combine. Add 3 eggs, and mix to combine. Add flour and cocoa mixture; mix just until moistened (do not overmix).

3.Prepare cream-cheese mixture: Whisk bar cream cheese with 2 tablespoons room-temperature butter. Whisk in 1/4 cup sugar, 1 egg, and 2 tablespoons all-purpose flour. Alternately spoon chocolate batter and cream-cheese mixture into pan; with the tip of a paring knife, swirl to marble.

4.Bake until a toothpick inserted in center comes out with a few moist crumbs attached, 50 to 60 minutes. ( check after 45 minutes ) Cool in pan for 30 minutes. Using paper overhang, lift brownies out of pan; transfer to a rack to cool completely (still on paper). On a cutting board, using a dampened serrated knife, cut into 16 squares. Store in an airtight container at room temperature, up to 2 days.

Note:  I put the chocolate batter in the pan and then spooned the cream cheese mixture over the chocolate batter.  I then took a knife and swirled the batter together back and forth from one side of the pan and then swirled again from the other side of the pan.  You can also put a layer of chocolate batter, dollop the cream cheese batter and then top off with remaining chocolate batter.  Then swirl.  This will put the cream cheese filling more on the top and center of the brownies instead of just the top. 


Plate of Cream Cheese Brownies


Close-up Cream Cheese Brownie

Enjoy!

Be sure to check out the Blog Hop below to see more recipes for the 12 Weeks of Christmas Cookies.


Mom's Cooking Club Lesson Gift/Packaging Idea -  A simple way to package these brownies....wrap a large brownie square in wax paper and tie a festive Christmas ribbon around it.  Place little treat package on your bosses or co-workers desk.  Give to your child's teacher or someone special.  If you are having a dinner party, put a little brownie package with a recipe card at each person's place setting. 

Sunday, November 22, 2009

Nestle Toll House Chocolate and White Chocolate Chip Pan Cookies

I wanted to share a cookie classic before leaving to visit family for the Thanksgiving Holiday. I grew up with Nestle Toll House Cookies. We would use the recipe on the back of the Nestle Chocolate Chip bag. I can't remember when the pan cookie variation came out but what a way to have your favorite chocolate chip cookie.....as a bar cookie. I haven't made these in so long. I was in the mood for chocolate chip cookies but didn't feel like making all those cookies. Then I remembered the pan cookie variation. Spread all the dough in a baking pan, bake, cut in squares and your chocolate chip cookie craving is satisfied.

Slight variation to recipe: I had some leftover white chocolate chips that I wanted to use up. I had about 1/2 cup of the white morsels and I mixed that with 1 1/2 cups of the semi-sweet chocolate morsels. We loved the addition of the white chocolate chips. You really can't go wrong with any chip variation you use. Kids love these pan cookies. If you want a quick treat for your Thanksgiving dessert table, then don't forget about these classic bar cookies that everyone remembers and loves.

I want to wish everyone a Happy Thanksgiving!

I'll be back after the Thanksgiving holiday with more cookie recipes just in time for Christmas.

Enjoy!

Mom's Cooking Club Lesson: Sometimes the best recipes can be found on the back of cans, bags and boxes of food. Classics that you grew up with that can be passed down to your family or updated recipes that become new traditions.

Tuesday, May 26, 2009

Lemon Bars


There's nothing better than a dessert baked from scratch. Normally my daughters like to help me bake but they were off doing some type of coloring craft project. So, I was left to fend for myself. No worries. This dessert was in and out of the oven in no time. I love anything with lemon and these are wonderful lemon bars. This recipe comes from the cookbook, Tate's Bake Shop Cookbook by Kathleen King. If you like baking, this is a great cookbook to have in your collection.
6 Ingredients - How easy is that?
Dot's Lemon Bars
BASE
1 cup salted butter, softened to room temperature
2 cups all-purpose flour
1/2 cup confectioners sugar
LEMON TOPPING
4 large eggs
1 3/4 cups sugar
Grated zest of 1 lemon
4 tablespoons all-purpose flour
1/2 cup lemon juice (about 4-6 lemons)
Preheat oven to 350 degrees
To Make the Base: In a medium bowl, mix the butter, flour and sugar with your hands till the mixture is well blended. Place the mixture in a 9 x 13-inch pan. Pat the mixture evenly on the bottom of the pan. Bake for 30 minutes.
To Make The Topping: While the base is baking, beat the eggs. Add the sugar and lemon zest. Mix thoroughly. Add the flour and mix it till it is incorporated. When the base is baked, remove the pan from the oven. Add the lemon juice to the sugar mixture and mix. Pour it over the warm base and bake it for 20 minutes.

When it is cool, cut it into squares. Dust it with more confectioners sugar, if desired.

Enjoy!

Mom's Cooking Club Lesson: How to store lemons? I've always stored my lemons in the refrigerator because they last longer. But the last batch I bought, I put in my fruit bowl. I got much more juice when they were at room temperature. Unfortunately, they don't stay as fresh as those stored in the refrigerator. So, my conclusion.....if you're going to use up your lemons in a week or so, keep them out in a bowl (it's pretty that way too) but if you want to keep them fresh longer, then put them in the refrigerator.


Blog Design By: Sherbet Blossom Designs