Saturday, June 26, 2010

Blueberry Banana Bread


Before I talk about this amazingly delicious banana bread, I want to announce the winner of the What's New and Delicious from Kraft giveaway.  Congratulations to Cheryl from The Lucky Ladybug (comment # 14 picked by Random.org).  I will contact you through email.  Thanks for everyone that entered!

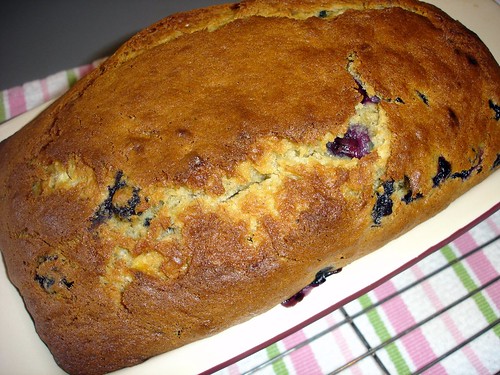
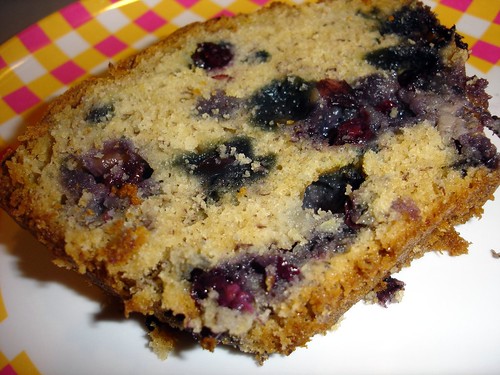
Now, on to the featured recipe.  I had some overripe bananas in a bowl and I had some blueberries in the fridge that I needed to use up before leaving for a family trip.  Put the two together and you have the most wonderful Blueberry Banana Bread.  I made my most used banana bread recipe from the Better Homes and Garden, New Cook Book (Pink Plaid Edition) and added blueberries to the batter.  A simple addition that turns this banana bread into my new favorite summer breakfast treat.

I took this loaf to my sister, Maxine's house, during a family visit this past week.  A great way to try something out is on family.  Everyone loved it and my mother, who was also visiting, couldn't stop eating it.  


Blueberry Banana Bread
Recipe slightly adapted from Better Homes and Gardens, New Cook Book 


Ingredients

2 cups all-purpose flour
1-1/2 teaspoons baking powder
1/2 teaspoon baking soda
1/4 teaspoon salt
1/4 teaspoon ground cinnamon ( I used slightly heaping 1/4 tsp.)
1/8 teaspoon ground nutmeg  ( I used slightly heaping 1/8 tsp.)
2 eggs, beaten
1-1/2 cups mashed banana (5 medium)
1 cup sugar
1/2 cup cooking oil or melted butter or margarine  ( I used canola oil)
1 cup blueberries  ( I used a heaping cup full)
1/4 cup chopped walnuts (optional)
1 recipe Streusel-Nut Topping (optional)

Note: I did not use the walnuts or streusel-nut topping in this recipe

Directions

1. Preheat oven to 350 degrees F. Grease bottom and 1/2 inch up the sides (or use cooking spray) of one 9x5x3-inch or two 7-1/2x3-1/2x2-inch loaf pans; set aside. In a large bowl combine flour, baking powder, baking soda, salt, cinnamon, and nutmeg. Make a well in center of flour mixture; set aside.

2. In a medium bowl combine eggs, banana, sugar, and oil. Add egg mixture all at once to flour mixture. Stir just until moistened (batter should be lumpy).  Fold in blueberries gently.  You can add nuts to the batter at this point if using.  Spoon batter into prepared pan(s). If desired, sprinkle Streusel Topping over batter.

3. Bake for 55 to 60 minutes for 9x5x3-inch pan or 40 to 45 minutes for 7-1/2x3-1/2x2-inch pans or until a wooden toothpick inserted near center comes out clean (if necessary, cover loosely with foil the last 15 minutes of baking to prevent overbrowning). Cool in pan on a wire rack for 10 minutes. Remove from pan. Cool completely on a wire rack. Wrap and store overnight before slicing.  (Or if you can't wait like me, just slice yourself a nice big piece!)

4. Makes 1 loaf (16 slices)

5. Streusel-Nut Topping: In a small bowl combine 1/4 cup packed brown sugar and 3 tablespoons all-purpose flour. Using a pastry blender, cut in 2 tablespoons butter until mixture resembles coarse crumbs. Stir in 1/3 cup chopped walnuts.  


Enjoy!

Mom's  Cooking Club Lesson:  This is peak blueberry season.  Blueberries are more affordable at this time of year. (my grocery store has been selling them for $1.50 a pint)  Blueberries are so versatile, delicious and good for you.  Just think of all the things you can use them in.....blueberry pancakes/waffles, quick breads, muffins, cobblers, smoothies,  in your cereal, oatmeal and yogurt.  Have you tried blueberries in your salad?  You must try this.  And of course there is the simplest way to enjoy them.....eating them right out of the container!   

Monday, June 21, 2010

What's New and Delicious from Kraft - Gift Basket Giveaway

I have a giveaway for you today.  Six new products from Kraft.  The gift basket will include these new products and/or coupons.  The items include:

 • New KRAFT HOMESTYLE DELUXE Macaroni & Cheese Dinner: a delicious homemade taste complete with a crunchy breadcrumb topping.

• New KOOL-AID FUN FIZZ Drink Drops: a fun and delicious way to get kids to drink water with only 5 calories per serving.

• RITZ CRACKERFULS Filled Crackers: made with real cheese and 6 grams of whole grain per serving to help keep you satisfied.

• New DIGIORNO Pizza & Breadsticks: fresh-baked taste with big juicy toppings plus cheesy breadsticks along with marinara sauce — all in one box.

• OSCAR MAYER Deli Fresh Shaved Meats: sliced, packed and sealed at the peak of freshness.

• New KRAFT 100 CALORIE PACKS CHEESE BITES: big cheese flavor in every bite-sized piece in these satisfying 100 calorie packs.                                                       


 Kraft generously sent me these complimentary items to try and to offer one of my readers a chance to win this gift basket as well. 

My girls loved the Kool-Aid Fun Fizz Drink Drops.  They put the drops in water bottles and loved the fizz.  Those fizz drops went very quickly.  Great for traveling or taking to the beach.

The updated Mac and Cheese was also a hit.  It was very creamy and a great item to have in the pantry for lunch or dinner.

We also enjoyed the Digiorno Pizza with Breadsticks.  We've always bought the Digiorno frozen pizzas to have on hand for those quick and busy nights when you need something fast.  Adding the breadsticks is fun.  Serve with a salad for a complete meal.

Would you like to taste these new products from Kraft?  Well, I'll make it easy for you.  All you have to do is leave a comment on this post telling me which new item you really want to try.  Or if you just want to leave a general comment, that's fine too.

The giveaway will run through Friday, June 25th, 2010 until 11pm CST.  I will announce the winner on Saturday, June 26th, 2010.  Winner will be selected by Random.org and will be notified by email. 

Disclosure Kraft Foods provided me a complimentary gift basket as well as to one of my readers.  Kraft is not a sponsor of this giveaway nor are they responsible for conducting the promotion or selecting the winner.  Opinions of the products are my own thoughts and feelings.

Mom's Cooking Club Lesson:  Hope you enjoy this giveaway!  I'll be back soon with a new recipe.    


Monday, June 14, 2010

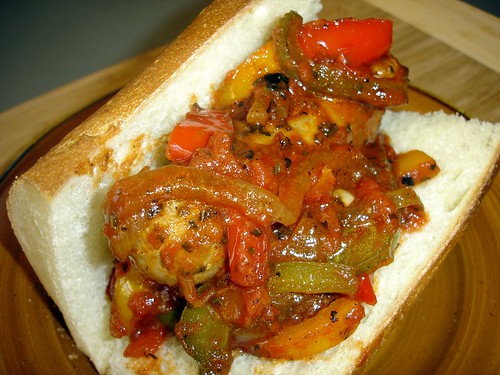
Sausage, Peppers and Onions


I'm guest posting today at my sister-in-law's blog, Aggie's Kitchen.  Head over to her site and check out this fantastic recipe for Sausage, Peppers and Onions.

Aggie has a wonderful blog and she was the one who encouraged me to start my own.  So, take a look at this recipe and some of Aggie's healthy and flavorful recipes.

I'll be back later this week with another recipe.  Not sure which one yet but stay tuned.

Enjoy!

Mom's Cooking Club Lesson:  Sausage, Peppers and Onions can be eaten as a sandwich like I've done here or it can be an appetizer or side to other Italian dishes.   

Tuesday, June 8, 2010

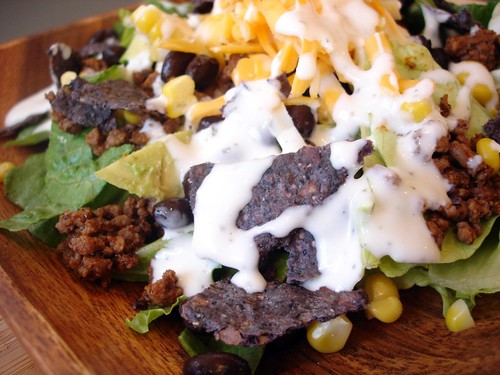
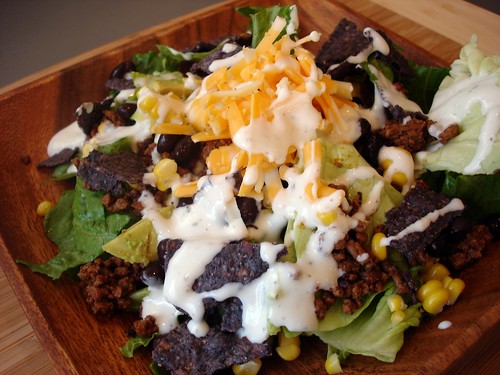
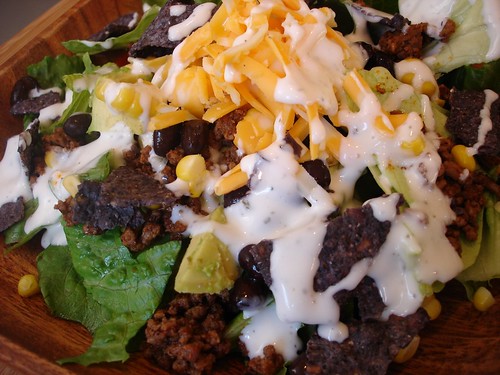
Build your own taco salad


We have had many "taco nights" but I wanted to do something different so I came up with this taco salad.  You start with a base of lettuce ( I used romaine and iceberg), serve it with seasoned hamburger meat and a bunch of different add-ins to make your own special taco salad.  This was a big hit with my family.  My husband and 2 daughters (and me too) loved it.  So turn your taco night into taco salad night! 

I adapted a taco seasoning recipe I found on Allrecipes.com.  I used this to season the hamburger meat instead of buying the packet of taco seasoning.  It was quick to put together and I liked the fact I knew exactly what ingredients were going into the mix.

Taco Seasoning
Slightly adapted from Allrecipes.com

Makes 1 ounce

Ingredients

1 tablespoon chili powder
1/4 teaspoon garlic powder
1/4 teaspoon onion powder
1/8 teaspoon cayenne pepper
1/4 teaspoon dried oregano
1/2 teaspoon paprika
1 teaspoon ground cumin
1 teaspoon sea salt
1 teaspoon black pepper

Directions

In a small bowl, mix together chili powder, garlic powder, onion powder, cayenne pepper, oregano, paprika, cumin, salt and pepper. Store in an airtight container.
 
To make seasoned hamburger meat:
 
Brown 1 - 1.25 pounds of lean ground beef in skillet.  Sprinkle the taco seasoning mix over the ground beef and add 2/3 cup water.  Stir well.  ( I used all the taco seasoning for about 1.25 pounds of meat )  Reduce heat and simmer for about 10 minutes.  
 
Add-ins for your taco salad:
 
Tomatoes
Black Beans
Diced Avocado
Corn ( I grilled corn on the cob to give it that charred smokey flavor...so good)
Blue Corn or regular Tortilla Chips
Shredded Cheese ( I used Cheddar but use your favorite)
Salsa


To build the taco salad:

Place lettuce on plate or a salad bowl.  Add seasoned ground beef and your chosen "extras".  Top with your favorite ranch salad dressing.  Eat!


Enjoy!

Mom's Cooking Club Lesson:  The seasoned hamburger meat is on the spicy side but it cools down some when mixed with the other ingredients. Adjust the spices (less chili powder, cayenne pepper and black pepper) based on your family's taste.  

Wednesday, June 2, 2010

Duo of Herb Dips......Basil Parmesan Dip with Pita Chips & Creamy Garlic-Herb Dip

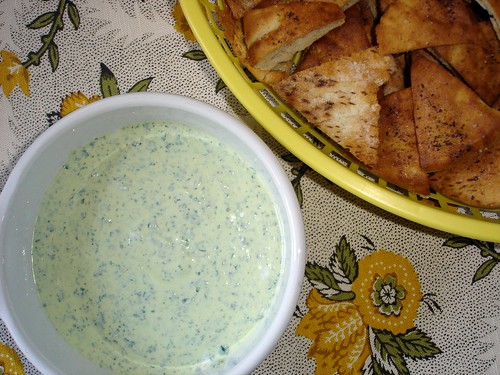
The Cooking Light Virtual Supper Club "meets" again.  This month's theme is Cooking with Herbs.  There are endless recipes using herbs but the recipes this month showcase herbs as the STAR ingredient.  Myself and the 4 other bloggers in the Cooking Light Virtual Supper Club have put together a great menu to share with you.  I made 2 herb dips.  One that highlights basil and the other that highlights parsley and chives.  Both dips were very good and easy to put together.  I made pita chips with the Basil Parmesan Dip and they were excellent and went well with the dip.


Here's the rest of the menu from the other supper club members.  Make sure to click on their links to read more details about their recipe.

Val from More Than Burnt Toast - Olive and Asiago Rolls
Jamie (me) - Basil Parmesan Dip with Pita Chips & Creamy Garlic-Herb Dip
Sandi from Whistlestop Cafe Cooking - Chicken Stuffed with Herbs
Patsy from Family, Friends & Food - Risotto With Fresh Mozzarella, Grape Tomatoes and Basil
Shelby from The Lives and Loves of Grumpy's Honeybunch - Pound Cake with Lemon-Basil Glaze 


The Creamy Garlic Herb Dip is great with a variety of vegetables. 


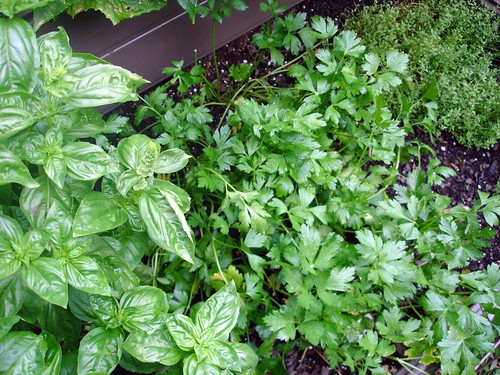
My herb garden is growing like crazy....Basil, Italian Parsley and Thyme

Enjoy!

Mom's Cooking Club:  Growing herbs at home is easy to do, fun and a great cost-saver.  I have herbs growing in pots and some in a small garden area.  You don't need alot of space and when a recipe calls for some herbs, I just go outside and cut what I need.   

Thursday, May 27, 2010

Beer Can Chicken

The first time I had Beer Can Chicken was last summer while visiting my brother, Larry and sister-in-law, Aggie.  I don't know why I waited a year to make it myself.  This is such a fun and delicious way to make chicken on the grill.  It turned out super good.  Give it a try this Memorial Day weekend or during the summer.  It will make a great presentation for your family and friends.  

The recipe I followed was from Steven Raichlen's cookbook, How to Grill, The Completed Illustrated Book of Barbecue Techniques.  My mother-in-law gave us this book years ago and it's an excellent all-around barbecue cookbook.  


See below for the Barbecue Rub recipe and some of my tips with preparing and cooking this chicken.


I used the Basic Barbecue Rub from the How to Grill Cookbook.  I make a batch and keep it in an airtight container.  It's a great barbecue rub to use on a variety of meats and seafood.

Basic Barbecue Rub
Recipe from Steven Raichlen’s How To Grill cookbook

1/4 cup (packed) dark brown sugar
1/4 cup paprika
3 tablespoons black pepper
3 tablespoons coarse salt (I used Kosher)
1 tablespoon hickory-smoked salt or more coarse salt
2 teaspoons garlic powder
2 teaspoons onion powder
2 teaspoons celery seeds
1 teaspoon cayenne pepper

Combine all the ingredients in a bowl and stir or whisk to mix. Transfer to an airtight jar or container and store away from heat and light. The rub will keep for at least 6 months.

Makes 1 cup

Tips:  Use a 12 oz can of beer.  Pour half out (you can drink it of course or use it along with water to soak your wood chips, if using).  I put 2 teaspoons of the barbecue rub in the beer.  I put 2 heaping teaspoons of the rub in the body and neck cavities of the chicken.  I rubbed canola oil on the outside of the chicken and then applied about 3 teaspoons of the rub all over the outside of the chicken.  

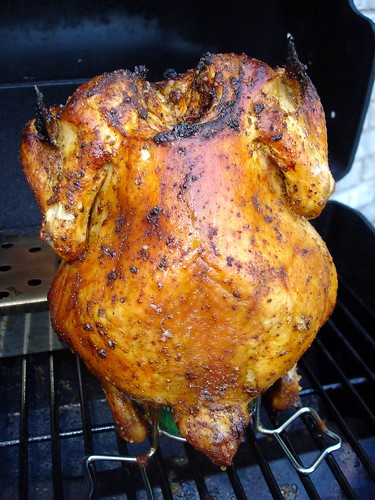
I bought a Beer Can Chicken holder at Lowes for a few dollars and it worked great.  There were no worries that the chicken was going to fall over.  I also used a wood chip smoking box that I also purchased at Lowes along with a bag of Apple wood chips.  I have a gas grill and I've never used the wood chips but always wanted to try them.  I soaked about 4 handfuls of the wood chips for at least 30 minutes.  You place them in the smoking box and place on the heated grill for about 10 minutes until it gets really smoking.  Then you put the chicken on the grill on the side with no burner on. (this will keep it from burning)  You keep the other side burner on and close the lid.  You may not think the chicken will cook but it does.  It takes about 1 1/4 hours but I recommend checking the temperature at 1 hour.  It should be about 180 degrees when inserted in the thigh.  It smelled incredible.  I'm sure all my neighbors were jealous : ) 

Let it rest for at least 5 minutes before taking it off the beer can.  My husband used tongs placed under the chicken to pull it carefully off the beer can.


This chicken was close to 4 1/2 lbs and it was ready in about 1 hour and 10 minutes.  See how the Beer Can holder works and keeps that chicken steady.  You can also see the smoking box in the back of the grill.  I loved using the wood chips.  It gave the chicken an extra flavor to it and it wasn't overly smoked at all.  I can't wait to try some other wood chips like hickory and mesquite.


Enjoy!

Mom's Cooking Club Lesson:  You can vary your can with root beer, cola or lemon lime soda.  You can also use your own favorite barbecue rub.     

Tuesday, May 18, 2010

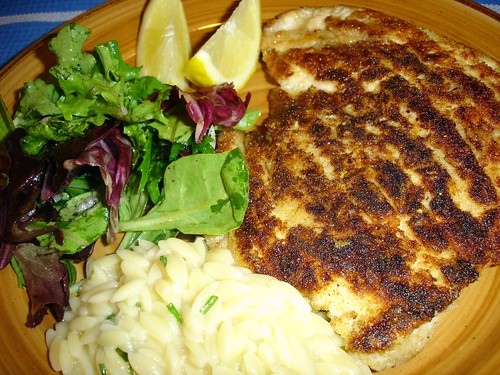
Dinner is served.....Chicken Milanese with Spring Greens and Parmesan-Browned Butter Orzo


If you read my blog, you know I like to make many recipes from Cooking Light magazine and their website.  There's a section in their magazine called Dinner Tonight which gives recipes for an entire meal.  The recipes usually take 30 or 40 minutes to make.  This meal plan is in their May 2010 magazine edition.

This is one of those family pleasing, family happy meals.  At least in my house it was.  The chicken was so flavorful and tender.  And it's pan seared in a little olive oil.  I did add a little extra olive oil when browning the other side of the chicken and for the 2nd batch.  The chicken went perfect with the orzo side dish.  And the light lemony salad dressing was the perfect complement to the whole meal.  This is a dinner that I know I will make again.

Note:  I did double the chicken recipe ingredients because the recipe listed is for 2 servings and I needed 4 servings.

Click here for the Chicken Milanese with Spring Greens recipe 

Click here for the Parmesan-Browned Butter Orzo recipe

Note:  The orzo recipe posted has a typo.  The recipe ingredient list has 1 1/4 cups of chicken broth but the instructions say to use 1 cup chicken broth.  You actually use 1 1/4 cup chicken broth.


Dinner is served!

Enjoy!

Mom's Cooking Club Lesson:  You want the chicken breasts to be thin so to make it easier to pound thin, I butterfly (cut) the boneless chicken breasts in half, longways, but not all the way through. You open it up and you have a very large chicken breast. I pounded the butterflied chicken breast to about 1/2 inch thickness. It is much easier to pound it thin like this then starting with the whole thick chicken breast. You can buy the thin sliced chicken breasts but I find them to be too thin sometimes.
 
Blog Design By: Sherbet Blossom Designs