Wednesday, September 29, 2010

2 More Days......12 Weeks of Christmas Cookies!


Are you ready for some Christmas cookies?  Well, stay tuned, because every Friday, starting October 1st, I'll be posting a Christmas cookie recipe for the next 12 weeks.  I'll be joining a group of bloggers who love baking as much as I do.  Each of us will be linking our blogs together.  So, there will be no shortage of Christmas cookie recipes this holiday season.

See you on Friday!!!!!! 

Monday, September 27, 2010

Roasted Carrots with The Kids Cook Monday!

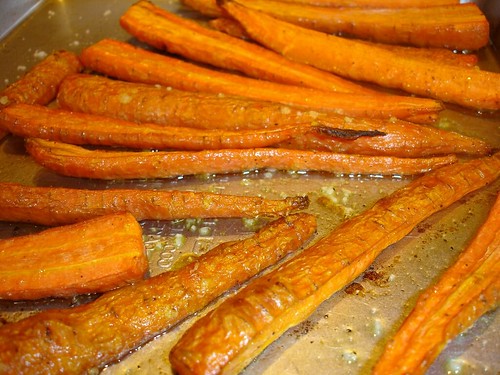
Roasted Carrots

Today is Monday and it's another recipe for The Kids Cook Monday!  Today is all about Roasted Carrots.  Roasting carrots bring out their natural sweetness and carrot flavor.  Nothing could be simpler than roasting vegetables and it's more of a technique than a recipe.  But the results are wonderful and if your kids won't eat raw vegetables, then try roasting them and you may see your kids gobble them down.  My daughter, Marissa does not like raw carrots but she likes them cooked and couldn't stop eating these. 

The Kids Cook Monday is celebrating the 10 year anniversary of another public initiative, Family Day - A Day to Eat Dinner with Your Children.  This program like The Kids Cook Monday, focuses on the health and social benefits of frequent family dinners. 

To celebrate this Family Day, The Kids Cook Monday has released a toolkit on their website that is free and downloadable.  This toolkit gives tips and ideas to help you plan, cook and eat healthy meals with your family every week.  Go to The Kids Cook Monday website to download your toolkit.


Roasted Carrots
Recipe by several sources from cookbooks & internet

Ingredients

10 - 12 carrots
2-3 tablespoons olive oil
Kosher salt
Freshly ground pepper

Directions

Preheat oven to 400 degrees.  Peel carrots if desired.  Cut carrots in half lengthwise.  Place carrots in single layer on baking sheet.  Drizzle olive oil over carrots.  Season with 1/2 - 1 teaspoon of kosher salt and some freshly ground pepper.  Toss carrots around to coat with oil and seasonings.  Bake in oven for approximately 30 minutes. 


I cut the carrots in half lengthwise.  These type of knife skills are too dangerous for my daughters so I took care of this task.


But, Mariah measured the olive oil and.......


........seasoned the carrots with salt and pepper.  Then she tossed it all together right on the baking sheet.


Marissa put the carrots in the oven.  About 30 minutes later out came these.......


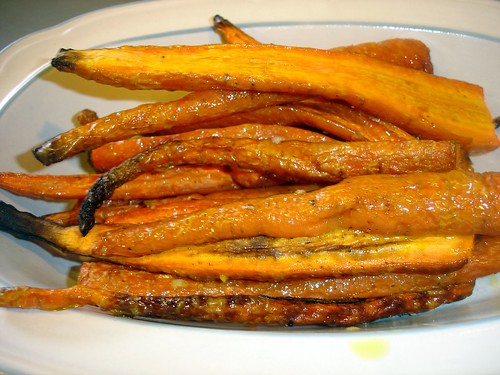
Roasted Carrots in Dish

Roasted Carrots!

Enjoy!

Mom's Cooking Club Lesson:  The website Fruit & Veggies More Matters,  lists the nutrition benefits of carrots as:  "Fat free; saturated fat free; low sodium; cholesterol free; excellent source of vitamin A; good source of vitamin C; low calorie."  Well, that sounds good to me.  Add some carrots to your meals this week and give yourself a nutrition boost. 


Monday, September 20, 2010

Herbed Parmesan Chicken Tenders with The Kids Cook Monday!


Welcome back to Monday and another segment of The Kids Cook Monday.  This program has been a great way for me to get my girls in the kitchen to help me prepare meals.  It has also been a learning experience as I teach them cooking skills and techniques.  We discuss the ingredients used and they have been asking me alot of questions about nutrition.

This is a fantastic way to make chicken tenders.  We all know how much kids love chicken tenders and nuggets.  We also know how some versions are not that great for you to eat.  These chicken tenders are marinated in buttermilk (I used low-fat) which keeps them tender and moist plus gives them great flavor.  They are breaded with a simple mixture of bread crumbs, Italian seasoning, salt and Parmesan cheese.  They are baked until golden brown and absolutely delicious.  We put ours on top a simple salad.

Another great meal we enjoyed together!  

I got inspiration from this recipe from Simply RecipesClick here for the original recipe.


Herbed Parmesan Chicken Tenders
Recipe by Jamie at Mom's Cooking Club
Ingredients

2 lbs chicken tenders (I used 2 packages which was 18 tenders)
1 1/2 cups low-fat buttermilk
1 cup dry plain bread crumbs
2 Tbsp Italian seasoning
1/2 teaspoon salt
1/4 cup grated Parmesan cheese
Canola oil
2 Tbsp butter, melted

Directions

Soak chicken tenders in buttermilk for 15-30 minutes.
Mix together the breadcrumbs, Italian seasoning, salt and Parmesan cheese in a plate or bowl.
Heat oven to 500°F. Line a baking sheet with foil. Brush the top of the foil with canola oil to help prevent sticking.
Remove the chicken tenders one at a time from the buttermilk and place in the bowl with the breadcrumbs, coating all sides with the breadcrumbs. Place on the baking sheet.
Drizzle the melted butter over the chicken tenders. Place in the oven and bake for about 12 - 14 minutes, until the chicken is cooked through, and the pieces are lightly browned.


A simple preparation: chicken tenders marinate in buttermilk for 15-30 minutes, then coated in the bread crumb mixture, placed on a baking sheet and drizzled with a little butter.  In 12-14 minutes, out comes the most moist and tasty chicken tenders. 


A simple salad of mixed iceberg and romaine lettuce, cucumbers, shredded carrots, feta cheese and dried cranberries.

Me (Jamie) and the dogs (MJ & Maximus) are supervising Marissa as she 
grates the Parmesan cheese.


Enjoy!

Mom's Cooking Club Lesson:  We put these chicken tenders on top of a salad with light ranch dressing.  Light blue cheese or honey mustard dressing would be delicious as well.  Or serve the tenders separately with a side of veggies.

Thursday, September 16, 2010

Yoplait Whips! Giveaway from MyBlogSpark


THIS GIVEAWAY IS NOW CLOSED.  CONGRATULATIONS TO RANDI FROM LITTLE FOOD, LOTS OF FLAVOR!  (Randi was comment #7, randomly picked by Random.org)

Do you like yogurt as much as I do?  Have you ever tried Yoplait Whips!?  It's a whipped yogurt that is so light and fluffy.  How would you like a cool treat that will satisfy your ice cream cravings?  Just place your Yoplait Whips! container in the freezer overnight.  I tried this and it was a delicious way to have an "ice cream" treat without all the calories from ice cream.  

Would you like to try Yoplait Whips! for yourself?  Yoplait through MyBlogSpark is offering one of my readers a fun prize pack giveaway.  See below for the prize pack details and how to enter.

Also, check out Yoplait on Facebook and Twitter.


Flavors List

Chocolate Mousse
Chocolate Raspberry
Key Lime Pie
Lemon Burst
Orange Crème
Peaches 'N Cream
Raspberry Mousse
Strawberry Mist
Vanilla Crème


Yoplait Whips! prize pack includes:  VIP coupon for a free container of Yoplait Whips! yogurt, a canvas cooler bag and a set of four ice cream cone shaped popsicle molds. 

Isn't that a neat prize pack?  I've been using the cooler bag for lunch at work and I love it.  And you can make so many different cold treats in the popsicle molds.  Your kids would have so much fun with these molds.

(Note:  The coupon offer for free Yoplait Whips! yogurt is not valid in some states, including California, Idaho, Louisiana, Minnesota, New Jersey, Nevada, North Dakota and Tennessee.)

Disclosure:  Yoplait through MyBlogSpark provided me this prize pack and will provide a prize pack to one of my readers in this giveaway.  But my thoughts and comments are my own.. 

How to enter:  Leave a comment on this blog post letting me know which Yoplait Whips! flavor would be your favorite.  Mine would probably be the Vanilla Creme because I love vanilla yogurt.  

The deadline to enter is this Sunday, September 19th, 2010 at 11pm Central Time.  I will announce the winner next week.  If you don't have a blog, please leave your email address in the comment section.  Open to U.S. residents only. 

Enjoy!

Mom's Cooking Club Lesson:  If you are eating Yoplait Whips! from the freezer, it is a good idea to leaving it out for 5-10 minutes before enjoying.

Monday, September 13, 2010

The Kids Cook Monday with Soft Black Bean Tostadas

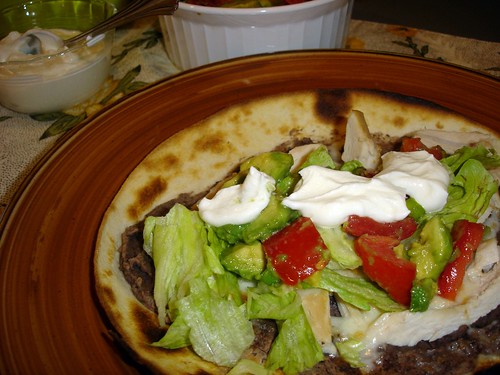
Black Bean Tostadas

It's Monday again and that means it's time for The Kids Cook Monday!  My girls got in the kitchen with me to make these "oh so yummy" Black Bean and Chicken Tostadas.  We had fun making these tostadas because we each got to "build" our own with our topping choices.  My husband and I loved the salsa with the fresh tomatoes, avocado, green onions and lime juice.  For convenience, we used rotisserie chicken.  This was a great family dinner that we all enjoyed.   

So, as The Kids Cook Monday program says, "Start your week off right: make Monday family night!  Easy to do with a family friendly and healthy recipe like these Soft Black Bean Tostadas.     

This recipe is from Cooking Light.  Click here for the printable recipe on Myrecipes.com.


I had other helpers in the kitchen today.  Say hi to Maximus and MJ!


The bean spread was easy and quick to prepare in my mini food processor.  A very good bean spread that would be great as a bean dip too.


The girls ate it burrito style. 

Enjoy!

Mom's Cooking Club Lesson:  There are many variations you could do with this recipe.  You could leave the chicken off and go for meatless tostadas.  You could brown some lean ground beef with taco seasoning or saute/grill some shrimp instead of chicken.  You could also use whole wheat tortillas to make it even healthier.   

Monday, September 6, 2010

Sesame Green Beans with The Kids Cook Monday!

Sesame Green Beans

Happy Labor Day everyone!  I hope you and your family are enjoying this day together!  It's also Monday and that means it's time for The Kids Cook MondayThe Kids Cook Monday is part of Healthy Monday, a non-profit public health organization founded in 2005 in association with Johns Hopkins University, Columbia University and Syracuse University.  "This is a weekly opportunity for families to take health into their own hands". 

What better way to start your Monday off in a healthy way than with fresh vegetables.  I stock up with a variety of frozen and canned vegetables.  But I try to use fresh vegetables as often as I can.  With a tiny bit of extra effort you can make some very tasty side dishes that your whole family will love.  

This was super simple to make and my daughters had no trouble preparing the green beans on their own.  If your kids are younger, they would love to sit at the counter with you and snap the beans in half.  These beans are crisp tender and just something extra special than your plain frozen or canned green beans.  My daughters had more than one helping and the bowl was empty when dinner was over.  (yippee!)

Japanese-Style Sesame Green Beans
Recipe by Cooking Muse on Allrecipes.com

Servings: 4

Ingredients

1 tablespoon canola oil
1 1/2 teaspoons sesame oil
1 pound fresh green beans, washed
1 tablespoon soy sauce
1 tablespoon toasted sesame seeds

Directions

Warm a large skillet or wok over medium heat. When the skillet is hot, pour in canola and sesame oil, then place whole green beans into the skillet. Stir the beans to coat with oil. Cook until the beans are bright green and slightly browned in spots, about 10 minutes. Remove from heat, and stir in soy sauce; cover, and let sit about 5 minutes. Transfer to a serving platter, and sprinkle with toasted sesame seeds.


Enjoy!

Mom's Cooking Club Lesson:  This recipe only takes 5 ingredients and cooks quickly.  Try finding recipes like this one that use fresh vegetables as well as being easy and quick to prepare.  Your kids will enjoy the variety and new flavors that vegetables can become.   

Wednesday, September 1, 2010

Cooking Light Virtual Supper Club - Fall Favorites with Beef Daube Provencal

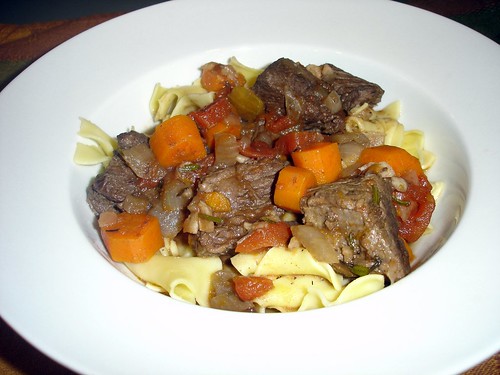
Beef Daube

The Cooking Light Virtual Supper Club is back this month with the September theme of Fall Favorites.  Now, I know it still feels like summer, but Fall is just around the corner. (my favorite time of year)  The 5 bloggers who make up the Cooking Light Virtual Supper Club wanted to help inspire you with some Cooking Light recipes that remind us of fall flavors.

I chose to make the main dish.....Beef Daube Provencal.  A classic french braised beef, red wine and vegetable stew.  This is such a hearty and comforting stew.  Very rich in flavor and the beef turned out so tender.  Perfect for fall and the cooler months coming up.

Click here for the Beef Daube Provencal recipe on Myrecipe.com

Here's the rest of our Fall Favorites menu......

Val (More Than Burnt Toast) - Frisee, Baby Spinach and Golden Beet Salad
Jamie (me) - Beef Daube Provencal
Shelby (The Life & Loves of Grumpy's Honeybunch) - Butternut Squash Blue Cheese Gratin
Patsy (Family, Friends & Food) - Roasted Cauliflower with Browned Butter
Sandi (Whistlestop Cafe Cooking) - Pecan Pie Ice Cream

Go to each individual blog link for more details on their recipes.


Beef Daube Provencel

Enjoy!

Mom's Cooking Club Lesson:  Braising is a cooking technique in which the main ingredient is seared, or browned in fat, and then simmered in liquid on low heat in a covered pot. Braising is best done in a crock pot, pressure cooker or Dutch oven.  Cooking the meat slow, moist and over low heat is how to take a less expensive, tough cut of meat and turn it into something tender and flavorful. 

 
Blog Design By: Sherbet Blossom Designs